Google Earth allows for saving images at screen resolution and JPG format. Those are helpful but still need processing and geo-referencing so that they can be used for GIS processing.
The method given below let you get high quality images from Google Earth in geo-referenced form. The principle is to extract images from the local Google Earth cache and then calibrate them for geo-referencing. Two small tools named “GE_jpg_extractor” and “QRST Convertor and Calibrator” will be used in this exercise. You can get them form
Best way to start is to clear the Google Earth cache folder from the Tools—> Options —->Cache —> Clear Memory Cache of GE software.
- In Google Earth, go to your area of interest. Set a proper zooming level which is required to you and pan to entire of your area with streaming so that it is saved in your local cache again.
- Close the program.
- Click on GE_jpg_extractor.exe

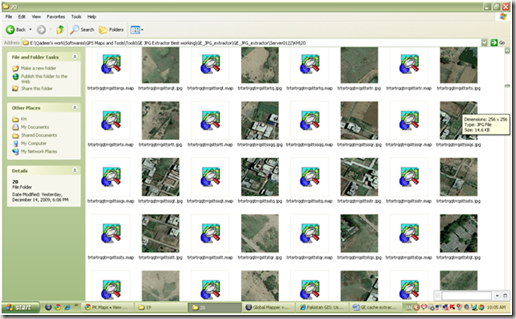
- You will see in the specified destination folder, there will be one or two new folders named “Server 0” and “Server 1”.
- Now run qrstcc.exe
![clip_image002[6] clip_image002[6]](http://lh5.ggpht.com/_s-MnWDlTdQw/SyclpVKI4-I/AAAAAAAABFg/aeXmLMkEOVE/clip_image002%5B6%5D_thumb.jpg?imgmax=800) It will open the calibrator for you.
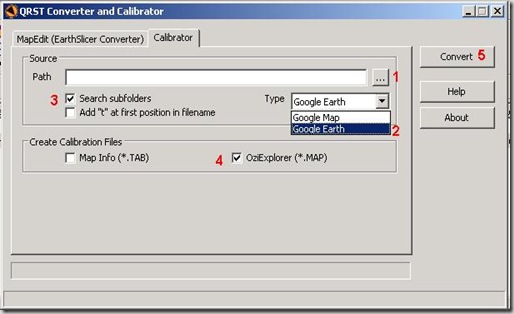
It will open the calibrator for you. - Follow the process as mentioned in the picture below to calibrate your extracted patches.

- In the Source Path, point the folder in which patches are saved. Generally it will be KH folder in Server 0
- Map type should be Google Earth
- Check the Search Subfolders option. It allows to create calibration file for all patches in the subfolders in KH, i.e. 01, 02, 03…..20
- Calibration file type should be OziExplorer
- Hit Convert, and progress will start. At successful completion it will give a message of “Done”.
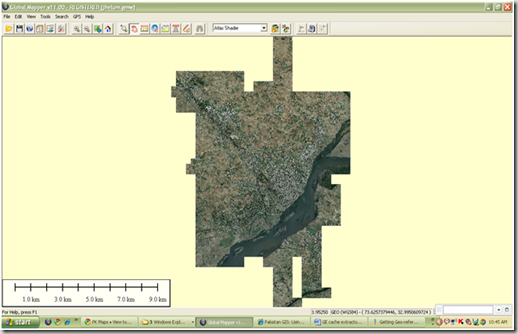
- Save the image as one file either in geotiff or any other image format you want. It will be georeferenced now can be used for GIS analysis purpose.
..::Enjoy::..


